
Small ubiquitin data set for running PONDEROSA-C/S is available from our [download] web page. Backbone and side chain assignments, and peak lists are all prepared by automation in the NMRFAM-SPARKY program and the I-PINE web server (two-letter-code "ae" in the NMRFAM-SPARKY).
This example section is based on the assumption that you are running linux. Not really different from the other operating system if you are not a server administrator.
If you have on the order of 90% of the chemical shifts assigned, you
may want to obtain a 3D structure as soon as possible. Maybe you have
3D-NOESY spectra collected and processed even they are not yet picked
for NOE peaks.
What you need to do first is to run Ponderosa Client.
$ PonderosaClient [enter] or double click Ponderosa Client icon.
Set a working directory. Create a new one.
Fill in your project information. The E-mail address is essential for receiving results.
Set up inputs. URL must be the server IP of yours or localhost (with
SSH tunneling) if
you are NMRFAM user. You can stick with CYANA
automation if your NOESY looks clean, or set it PONDEROSA refinement.
Click Analyze NOESY button and wait for 10-30 min for the initial peak identification and validation. After that, click Calculate strc.

If you see the message that you are accepted, just close the Ponderosa Client and wait for emails from Ponderosa Server. If you see the message that you are denied, contact server administrator or NMRFAM.
Soon, you will receive a notification of receipt of the job from the Ponderosa Server.
Wait for a few minutes to hours depending on your settings until you receive another notification from Ponderosa Server.
Download zip file from the URL in the email, and unzip in separate folder.
Run Ponderosa Analyzer.
$ PonderosaAnalyzer [enter] or click the iconSet the separate folder as a working directory in the Ponderosa
Analyzer. It will take a couple of minute to make a full backup of
outputs in case. Only Best Evaluated
will be seen at first as it is default in Calculation stage box. Try to
change to All and find the
best one by using sort drop
down menu.

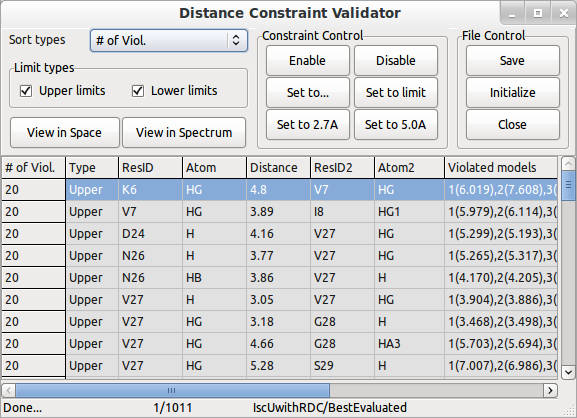
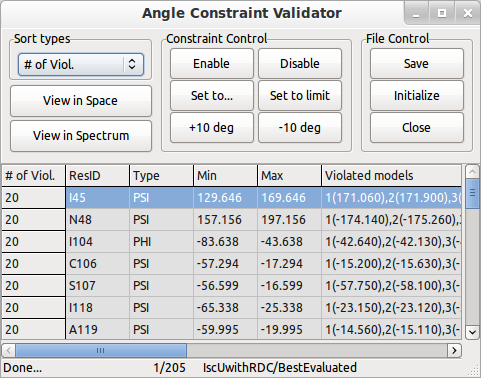
Use Distance Constraint Validator and Angle Constraint Validator to verify the constraint files used for this structure. You can work with integrated PyMOL and Sparky to validate the constraints (PyMOL, SPARKY installation needed).


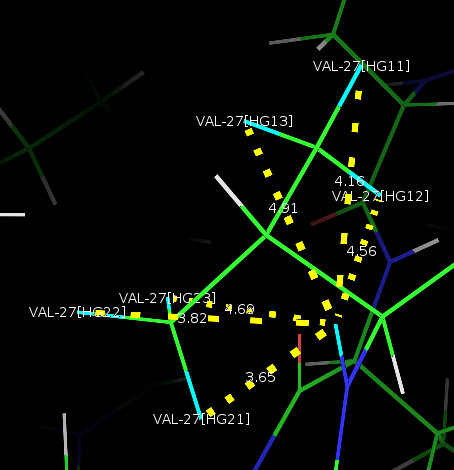
If you want to see it in PyMOL, click View in Space. It will bring
up PyMOL. Once you have PyMOL launched by Ponderosa Analyzer, you do
not need to re-launch. Just type @p in the PyMOL
command to update the screen. After that, you can easily update by clicking on the up arrow and pressing “enter”.

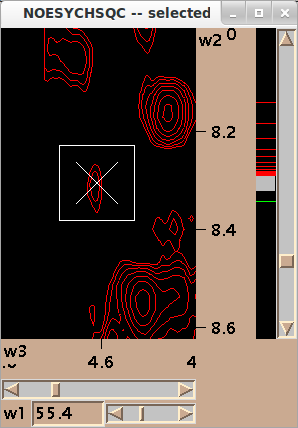
Spectral view in SPARKY is also supported. Click View in Spectrum, open your SPARKY
project and type up
two-letter code in SPARKY (NMRFAM-SPARKY required). Connect
Ponderosa Analyzer window will pop up.
Connection file, sparky.cnt, will be set automatically. Set drop
down menus for spectrum types. If you do not have specific NOESY, it
can be set to any. Click the Update
button to load the spectral position of your selection in your Distance
and Angle Constraint Validator. Whenever you select a constraint in the
Validator, click the Update button to reload the positions. You can move to the place of the constraint by double-clicking on the label or by clicking the Move button.
This will bring you to the position.

Keep validating violated constraints and correct them.
[Distance Constraint Control] [Angle Constraint Control]Use Constraint Controls to correct. Enable and Disable
will make selected constraint effective and ineffective. Set to
functions will change the value of constraints. For the example shown
above, if you click Set to 5.0A, the upper limit will be changed to 5.0Å. In this way, you can fine-tune constraints.
A useful feature for tracking modifications is the Comment function. Double-clicking on a constraint will bring up the following dialog window.
You can add or edit any comment to the selected constraint.
By using this feature, you will not mess up your corrections.
After all the validation and correction are done, click Save in the
Validator windows.
Click Export for Ponderosa Client
and select a directory to write input constraints for Ponderosa Client. Exported file names will
be postprocessed.upl,
postprocessed.lol
and postprocessed.aco.
Set up others as in the previous run in Ponderosa Client, but add additional constraints such as the following.
And do not forget setting Constraints only.
Click Analyze NOESY and Calculate strc for refined structure calculation.
We provide the Ponderosa Server program to institutes that have valid CYANA licenses. The program is essential for PONDEROSA-C/S but not publicly available.
If you decided running your own Ponderosa Server, please check prerequisites first [Click here].
* Check STRIDE
* Check TALOS-N (or others)
$ talosn
* Check mail
* Check CYANA
$ cyana
* Check MolProbity
$ oneline-analysis
* Check CNS (not necessary if you have XPLOR-NIH installed)
$ cns
============================================================
Next, create a directory where all the job submissions reside, and create a directory where will be externally approachable by URL. Apache set up required (/etc/httpd/conf/httpd.conf).
Move to the job submission directory, run Ponderosa Server and set up directories and URL.
Upload directory will be where you just created for job submission storage.
External directory will be where you just created and set up Apache.
External URL will be the address for the outside (http://.....).
Set server list if you have multiple servers to distribute job loads. If not, just use localhost.
Make sure all the servers have capability of running CYANA. Plus, the Upload directory must be shared via Network File System (NFS) with the same directory name.
Click Start server, and click stop server right after. Close the program and move to the External directory.
Modift text files containing email body will be sent to users and administrator. "welcome_email.txt" will be sent when the job is submitted at first, "success_email.txt" and "failure_email.txt" will be sent when the job is succeeded or failed. "admin_email.txt" contains administrator's email address.
Move to the Upload directory, re-run Ponderosa Server and click Start Server button.
$ PonderosaServer | tee 031514.log
Reference: